Friday, May 12, 2017

Recognizing Strengths and Weaknesses Within a Series

Recognizing Strengths and Weaknesses Within a Series:
Engineering a Reverse Sweep


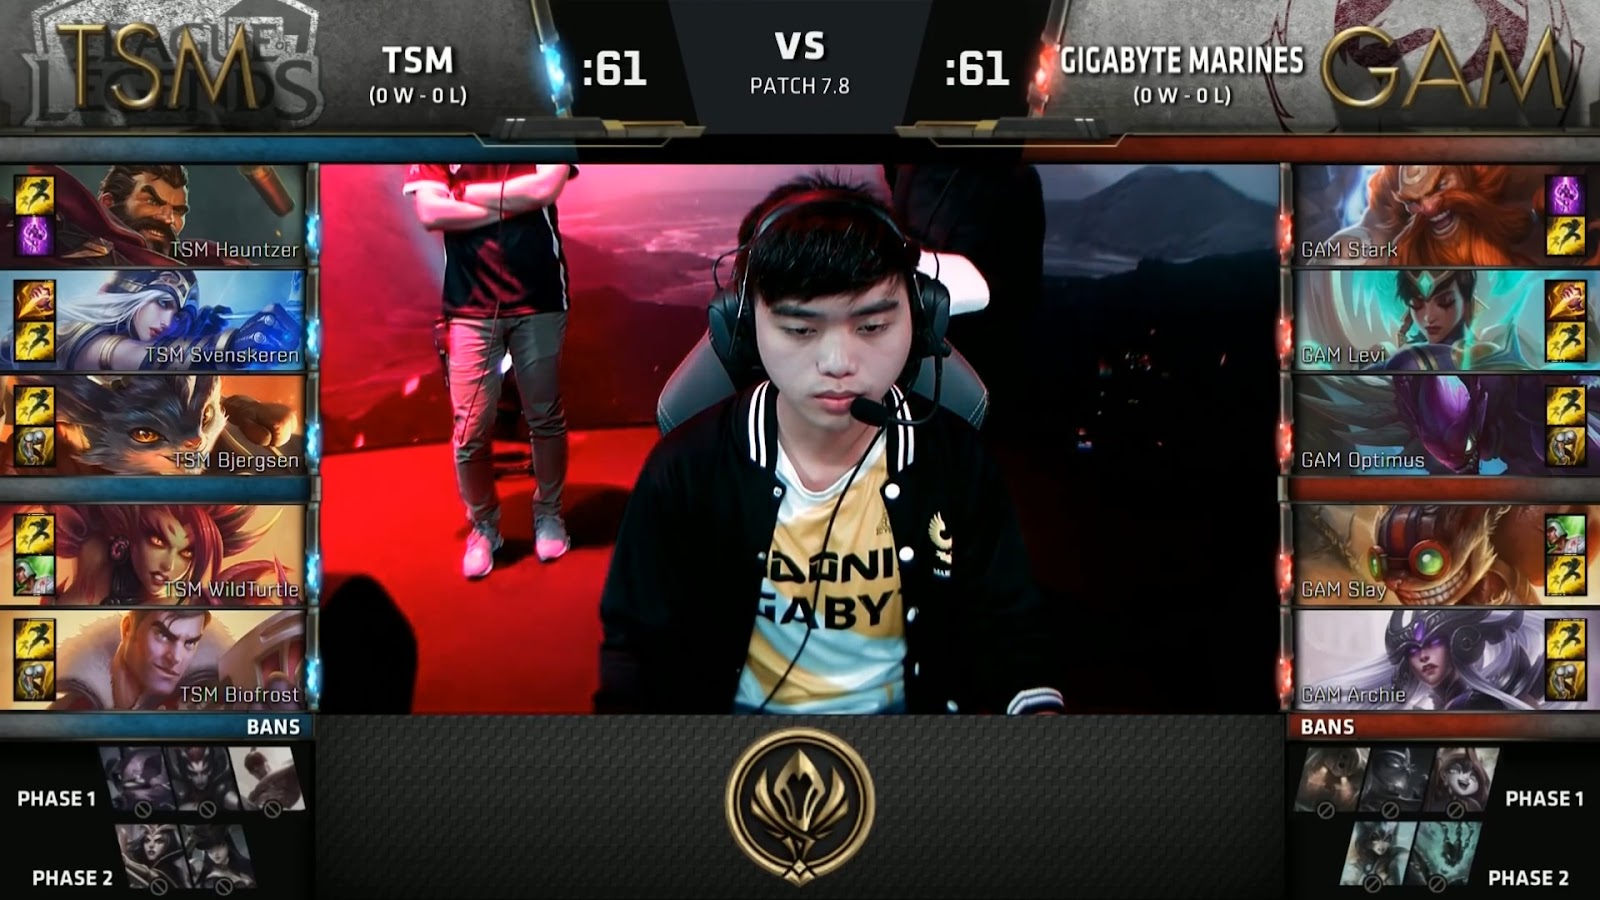
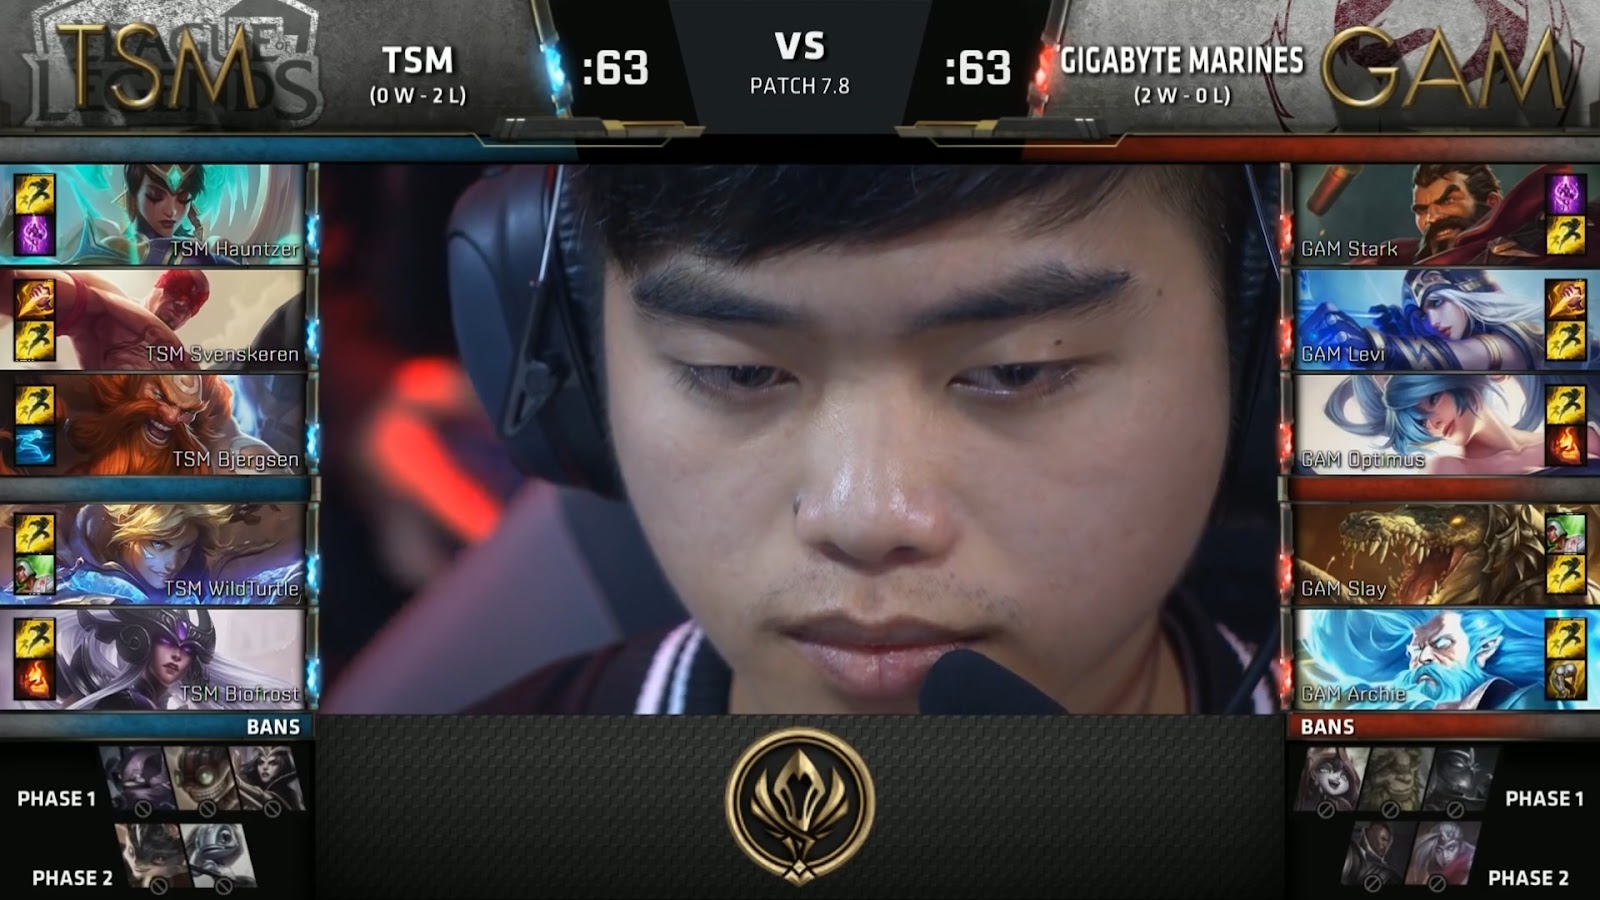
Today I want to look at how to recognize a team’s strengths and weaknesses not as a whole, but within a best of series.  Being able to quickly recognize these points is essential in not only comebacks, but also in controlling a series from game 1 on.  To do so, we’ll be looking at TSM v GAM from the play-in stage of MSI 2017 primarily games 1 and 2.  We’ll briefly look at Pick and Ban strategies as well as some key moments in game as we talk about the flow of the matches while building a game plan based on how this specific best of plays out.


Game 1
There’s plenty of scouting and research that goes into preparing for any match, let alone a best of series, but what we want to look at is reading the match from game 1 on, so let’s jump into Picks and Bans.
G1 PB.jpg
From the first game, we should take away two points from TSM’s perspective.  One, bans are focused against Levi for the early game jungle as well as preventing Kennen from being a huge bully in the top lane.  These bans should immediately indicate that TSM are looking to play a standard match focused on group teamplay rather than split-push play that wants to dodge early game aggression, moving into the mid-game for their win condition.  This is reinforced by their picks, a heavy farming jungler, Ashe, and Rumble.  From this we can understand TSM’s attempted game plan.
The second point to take away, is the Ziggs red flag.  Ziggs isn’t broken by any means, but to the support staff and to players, the pick should signal a few things.  GAM want to create a non-interactive bot lane.  They want to outpush, farm, and all around ignore TSM’s duo lane.  The signal that should flash, is the power curve difference between Ziggs/Karma and Ashe/Zyra.  While Ashe/Zyra level 6 is strong, GAM have no reason to be in a position to worry about this and as the game progresses, Ziggs will spike harder in the mid-game providing much more damage than Ashe will.  This is further compounded with Ashe having difficulty providing DPS uptime against Syndra/Gragas where as Ziggs will be able to freely spam spells. The last flag, and one of the biggest, is simply comfort.  Playing against Ziggs is rare for TSM and so their comfort level against the champion, in lane, out of lane, and in macro decisions is going to be bad.  This doesn’t mean an immediate plan to ban next game in itself, but that he needs to be carefully watched by the support team.
With these two points, one can conclude that TSM need to play calmly.  Ziggs will throw a wrench into their bot laning phase, and their mid-game, but if they play lanes well and earn small advantages they can move into group play without falling behind the power curve of tank v. no tank and Ziggs v Ashe.  But, if you watched the game, you will know that was not what happened.  Let’s take a look at a few key points.


G1 1.jpg
The first issue for TSM, is how they play out this invade.  The invade itself is fine, they have the man advantage and arguably a better level 1.  However instead of warding the bush and pushing out GAM, TSM start the raptors, creating a 50/50 smite situation that turns bad.  TSM should be playing a controlled, slow game taking small advantages, but right off the start they go for a risky, snowball potential move while also playing it wrong and GAM start off ahead.  This is further compounded by Hauntzer being forced to back and use his TP to get to lane at level 1.
The early game continues to go in GAM’s favor, but let’s jump ahead to 10:30 and look at how the lanes have been progressing.
G1 2.jpg
The main thing to look at here, is the CS numbers.  Despite being behind 4 kills, and having a major difference in pressure from junglers, TSM’s Top 3: Top/Jungle/Mid, are keeping up or surpassing their counterparts.  This is huge.  It shows that even when significantly behind from the very get go, they are not losing out in lane to their counterparts in CS, watching the game we can also see that they are not losing in lane pressure either, at times even controlling the lane.  This is a major strength for TSM, and one that expresses the potential skill difference between players.
The other take away, comes from bottom lane.  Neither duo has really been pressured, turrets are near full health, CS is close to even, the difference mainly coming from WT’s death in lane.  In a way, this is also a strength that TSM should recognize.  In an uncomfortable and unfamiliar matchup, WT/Bio are not falling significantly behind.  They’re doing well on an island in a bad matchup.
G1 3.jpg
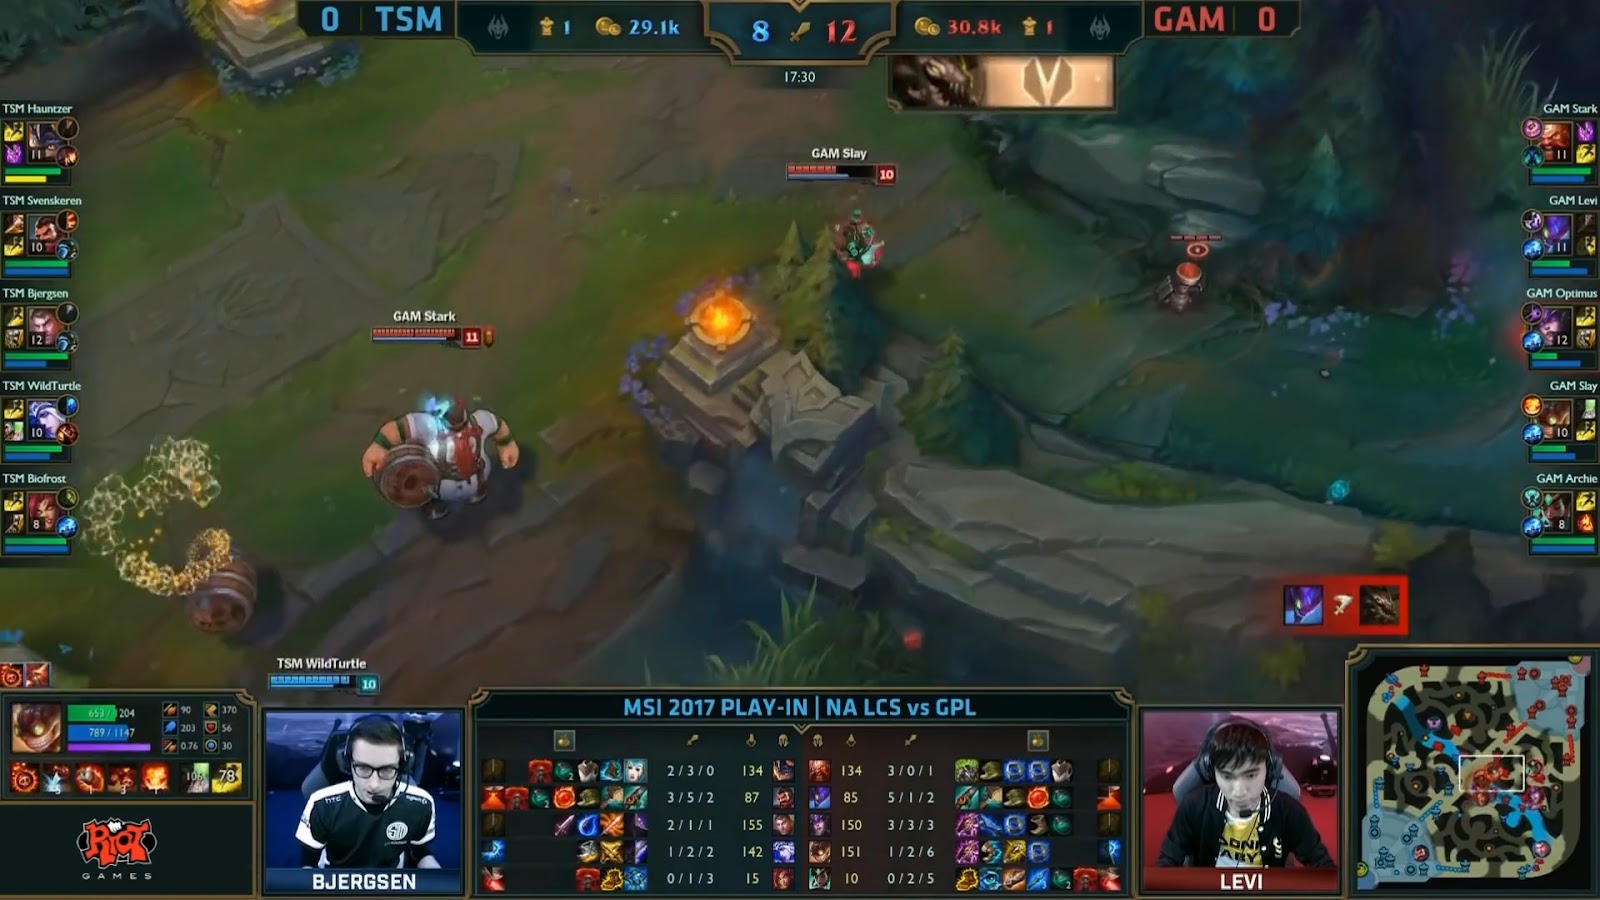
As we progress, TSM are able to still make plays from behind, getting a couple kills, including a solo kill in mid-lane during a 2v1.  Around 13:30 we also see a very scrappy, messy fight in which GAM over extend, but in doing so draw TSM into the messy fight, during which we see even more outplay potential from Bjerg.  Jumping ahead to 17:30, just before TSM’s mid turret falls down, we can see that the early gold lead from GAM has actually decreased.  All of TSM’s lanes have stayed relatively even to their counterparts, and though the game is about to break open, recognizing this in the moment provides great insight moving forward.  In a potentially significant way, ALL of TSM’s lanes are outperforming GAM, keeping up from behind and preventing a major snowball.
It’s at this point though, that the game is out of TSM’s control, GAM’s powerspikes are hitting, and the lack of a frontline from TSM allows GAM to control the flow of teamfights.  It’s a slower end than better teams will create, and there are mistakes that GAM make that show more small mechanical mistakes from GAM that TSM can take away.  However, as far as improving the game plan going forward, this a good place to stop.  From here on out TSM should lose.
From this game, we can take away several strengths and a few weaknesses, building a plan into the rest of the series.
  1. TSM is playing better in lanes, particularly Top/Mid.  Knowing this, slowing down the game and focusing on having a strong Top 3 is a major strength for TSM, building small advantages up over time.
  2. Sven, despite several deaths, is keeping up in the jungle, though his lane presence was miniscule.  This indicates a difference in jungle style.  Levi is doing “better” being more impactful, but Sven is playing “smarter” in his ability to keep up in farm and knowing where to path for counter-jungling.  Knowing this, TSM can play to put Sven on a strong, control oriented jungler.  Graves, Lee, Ivern come to mind.  Pathing to keep an eye on Levi and prevent his ganking.  It’s likely Sven can build a lead over time by preventing Levi’s impact.
  3. Hauntzer stays even in a somewhat skill oriented matchup, despite jungler focus.  Knowing this, getting Hauntzer into a skill matchup is likely best, allowing him to outplay his opponent.
  4. Hauntzer and Bjerg do very well despite disadvantages from level 1.  This should signal to TSM to put focus into them, prioritize the Top/Mid side of the map.
  5. WT/Bio stay even despite an uncomfortable lane, however they do remain ineffective.  This has 2 quick takeaways.  The first is, remove Ziggs from the equation.  It turns bot lane into a non-interactive lane and if WT/Bio are able to play well in this type of situation, they should do even better when in more comfortable, standard matchups.  The second take away here, is that WT/Bio do not need any focus and will be perfectly fine on an island.  As TSM’s Top 3 are going to have a bigger impact against GAM, their duo should be given a self-contained lane and mostly left to their own devices.
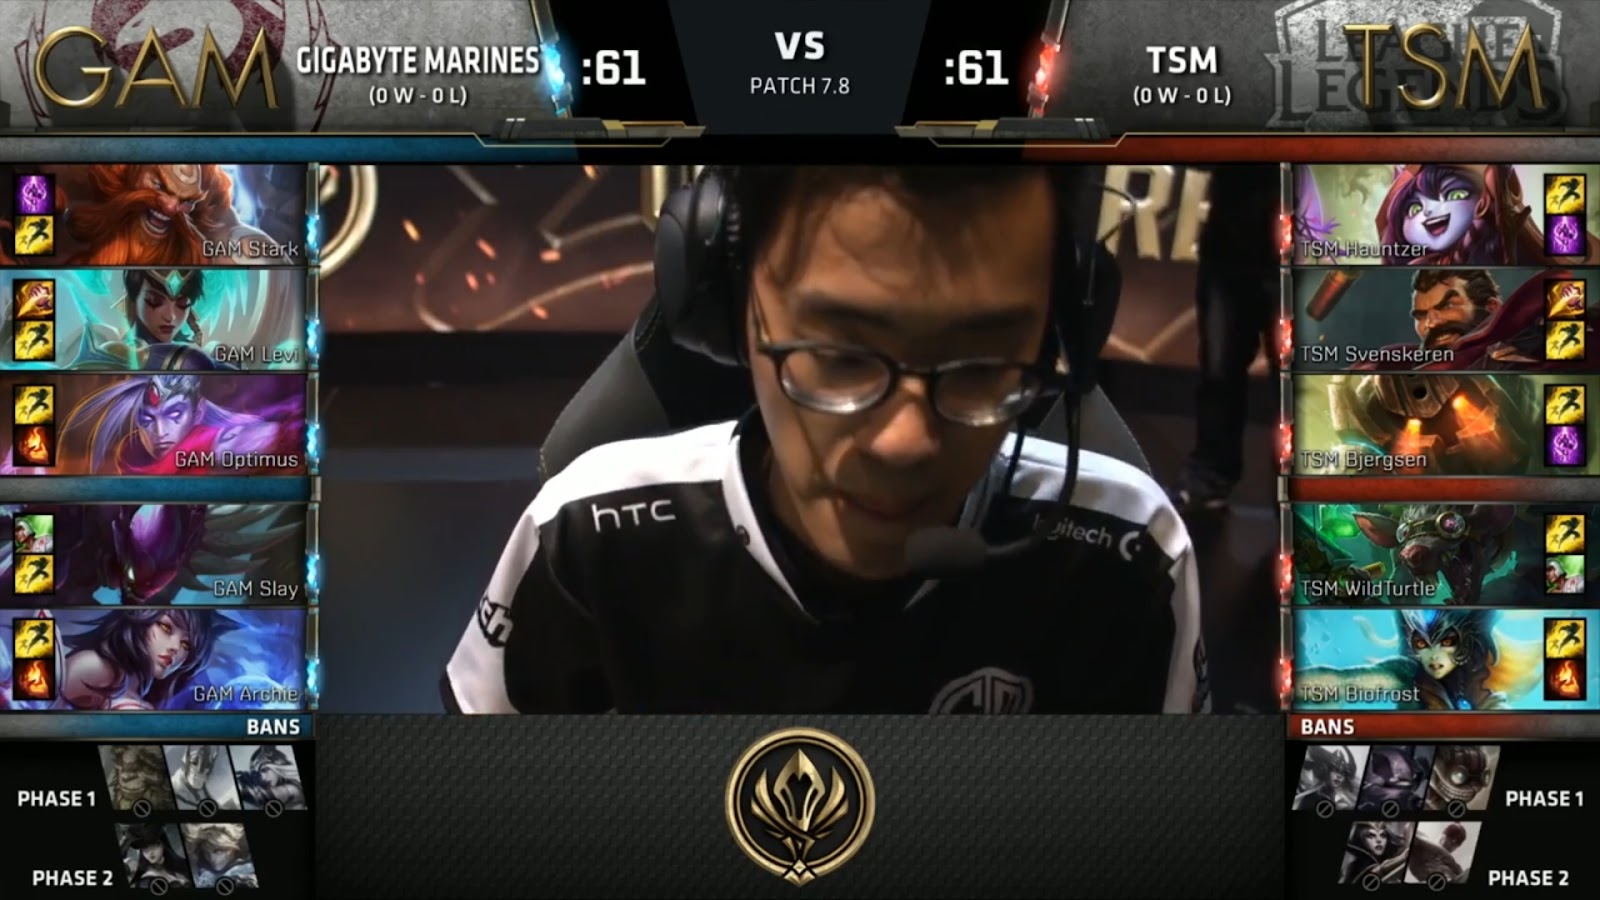

Game 2
G2 PB.jpg
Starting right from picks and bans, we can see that TSM hasn’t really recognized their their strengths and weaknesses from their first game, and oddly enough end up creating a worse draft than last match.  Let’s hop into it.
From the start, TSM’s choice of bans are awkward.  Kennen is fine, but they’ve seen that Levi can play Kha’zix to great success, banning Graves is essentially ineffective.  The Rumble ban is also suspect, considering that Hauntzer was doing well in lane, he should be able to beat Stark no matter what he picks.  Not banning Ziggs is a red flag again as well.  TSM’s mindset is mismatched from how last game played out in that they believe the problem was not having a tank and want to force that matchup top.  I dunno, I think these bans are bad and don’t play to anything that should have been learned from last match.
Moving into picks, TSM picking Ashe, knowing GAM are likely to run Karma/Ziggs again is regretful.  There is a lack of understanding in the lane matchup, as well as how it pushes compositions.  Especially when looking to force a tank v. tank matchup and picking up Lee Sin, there’s a massive potential for hampering your team’s DPS moving forward, which is what TSM end up doing.  Letting Gragas go over to GAM as well is suspect.  We want Hauntzer to be able to have a skillful matchup, but picking Nautilus really puts him into a somewhat skilless top lane while being on the less technical side of it as well.
The last round of draft is also awkward, in that TSM bother banning Fizz while leaving up Ekko.  This was a great spot to ban Ziggs and believe that Bjerg could win the lane, but TSM think they can do fine if Ziggs is picked again.  At this point in the draft though, TSM are almost dead in the water.  Once GAM nab Ziggs, they have only snowball as their win condition, and last picking Braum just makes that all the more difficult.  Not only are TSM fighting with low sustained DPS, they cede bot lane to GAM with the Braum pick further pushing them back in terms of power curves.
All in all, TSM’s draft doesn’t play to their strengths from the previous game, instead playing down their own strengths while GAM stays the same.
G2 1.jpg
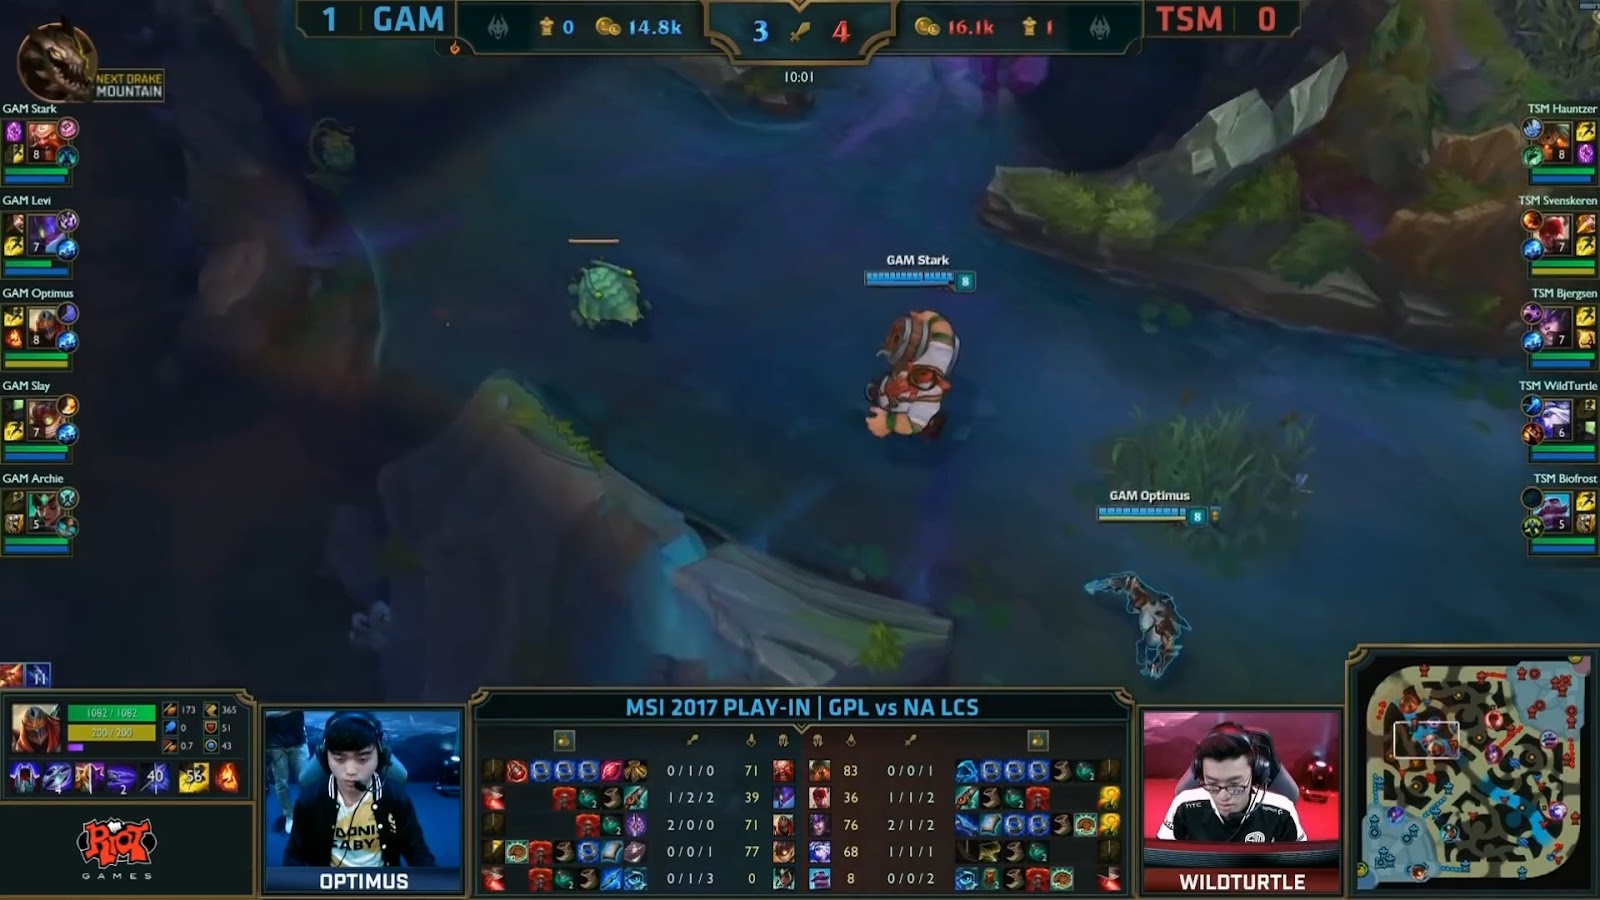
We’ll jump straight into the 10 minute mark.  For those of you who haven’t watched the match, the games a bit messy but does favor TSM from the start.  They respond well to GAM’s aggression and do pull out a lead.
Once again at 10 minutes, we can see the Top 3 of TSM staying even or outperforming GAM in a chaotic game.  This time Hauntzer has been building a lead, and Bjerg is winning lane and providing more control than Optimus.  TSM’s duo lane is also staying strong in the lane, despite another death.  In an even worse matchup, they are staying even, and their turret is still strong.  What we can see at this point, is the same strengths as game 1, but in a stronger fashion.
G2 2.jpg
Looking a little big forward to the 2nd dragon fight, we can see that TSM are significantly ahead in terms of gold, but here is where things go sour and we see the compositional errors that TSM made shine.  TSM’s composition is good at the start of the fight.  Though Optimus gets a good flank, TSM are able to come out ahead in the fight, getting a 2 for 1.  It’s at this point TSM should just back off, they have used their burst damage and need to recognize how low their sustained damage is.  Instead, TSM try to fight and give up 3 kills for 0.  TSM did not recognize the difference in sustained damage and fall in what is essentially Syndra vs 3.
After this, we once again see that TSM are unfamiliar with Ziggs, moving to push bottom while leaving him alone top, ending up in a terrible trade that pulls GAM back to even gold and in control of the match with better split-push and better team-fighting.  This exactly same situation occurs again at the third dragon, in which TSM start the dragon and lose the fight even worse, having no sustained damage, especially with WT pushed out by Zed.
For TSM, there should be 3 big takeaways from this game.
  1. The same strengths that could be taken from game 1 still apply.
  2. Rushing plays, forcing objectives, and all around not taking the time to control fights and the map are playing right into GAM’s style.  Particularly the dragon fights are showing TSM’s lack of respect, or understanding of GAM’s composition against their own.  They need to slow down and play the game we know TSM is capable of.  With their strengths once again showing the same as game 1, TSM should be playing the game of a thousand paper cuts.  Turning small advantages in lane into a substantial team advantage.
  3. Take out Ziggs.  This is the second time he’s prevented TSM’s duo from being a factor in lane as well as providing significantly better presence in team fights.  This game also shows how he twists the macro element of a match and can punish if teams are unfamiliar with him.


Game 3
Moving into Game 3, the plan for TSM should be the same as after game 1.  These points have only be reinforced by game 2 and must be recognized at this point.  Let’s look at draft.
G3 PB.jpg
This. Draft. Is. Perfect.  Everything about this draft from TSM is done right and plays 100% to their strengths against GAM and stopping their weaknesses.  First off, Ziggs is banned and jungle bans have been dropped, recognizing that they can’t stop Levi and need to let Bot lane “play the game.”  Snagging Karma early gives TSM a great starting point for bot lane, and dropping the early Ashe allows more flexibility.  Taking Gragas before GAM is also huge, it gives Hauntzer a near guaranteed skill based lane in which he can show his prowess.  Moving into the second phase, TSM pick up a strong mid laner for Bjerg that he can dominate with, and WT is put onto a self-sufficient ADC.  This draft works so well in TSM’s strengths and is what we should have seen from game 2.
As for the game itself, there’s not much to say about it.  TSM win lanes, and stomp the game.  This is what you see from a better team when they get a controlled early lead and have a solid composition.  With a skilled matchup for Hauntzer, we see him shine.  Bjerg again controls mid, and TSM’s duo, now in a lane that actually interacts with each other, are able to show that they’re just fine being left alone and can even pull advantages in lane.  Great job and the takeaway is easy.  Do it again.


Game 4
Moving into game 4, TSM falter.  Their great game play and plan from game 3 seems to have been forgotten and they fall away from their strengths in this series.  Let’s look at the draft.
G4 PB.jpg
TSM’s first round is solid.  They stay with the same bans and take the Karma.  I’d almost like to see a Gragas ban instead of LB, but GAM gave it up last game, and keeping it from Optimus is fine.  The Nautilus pick is ok, it puts the lane back to neutral in which Hauntzer should get a small lead, but will be unable to really showcase dominance in lane.  It’s not the best start, but it is solid.
The issues start to show in the 2nd round.  We get double ADC bans from GAM, but it still leaves up options for TSM’s duo to have a self-contained lane.  Caitlyn and Lucian are both solid picks here, allowing them to show laning skill, staying even or ahead of GAM.  The biggest problem comes with picking Orianna.  TSM are putting a lot of their eggs into WT and so far in the series the bot lane has not been TSM’s strongest point.  With the Orianna pick, TSM’s duo can no longer just do well/better and move into teamfights as a solid point, but have to dominate and turn into the linchpin for TSM.
By no means, however, does this mean TSM are at a disadvantage, when playing controlled, they are still showing up as the better players, it just means that they haven’t given themselves the highest chance possible from the start.
G4 1.jpg
Right off the bat, TSM’s duo are playing without control.  They go all-in at level one against a duo that has sustain.  The all-in fails and WT is forced back, losing any control they should ahve had in the matchup.  Another mistake happens mid-lane, when Bjerg doesn’t respect the level 6 from Fizz, even when knowing that he will have the exp advantage from both TP, and the current lane push.  More early game overzealousness puts TSM behind, but just as in previous games, if we look at the 10 minute mark we can see all lanes on TSM are staying even/ahead in CS despite deaths and greedy plays in lane.
G4 2.jpg
Again, we can see TSM gaining on GAM’s gold lead around the 20 minute mark, pulling ahead in CS and getting a few kills of their own.  There are still mistakes, like Hauntzer trying to defend top T2 turret, but overall there is a slow gain for TSM.  Shortly after though, at the next dragon, TSM almost lose the game.  Though they are climbing back, and going to scale well with Caitlynn, WT’s Flank? If you can call it that at dragon is just a huge mistake (but we can learn from this) and extremely surprising, this should signal a big lead for GAM as they threaten Baron and get more kills, and then the inhibitor, but luckily for TSM they throw here as well, trying to end the game but instead handing TSM the Baron and the win.
There is something we can heavily take away from this game that shows its head more than previous matches.  We can still pull from this game that TSM are better off focusing the Top 3 and leaving their duo to play well on their own.  The big new thing or rather confirmation is about TSM’s weakness against GAM.  TSM need to stop trying to “make plays.”  There feels this deep seeded need to “show off” to stomp GAM to almost prove to themselves that they are good players rather than knowing that they are and playing a solid game.  They take risky plays, force fights, try to be the hero, and it’s not working out.  Pressure is hitting TSM hard.  It’s been their main weakness for the whole series, but here more than any other game, it shines through.


Game 5
Finally, we move into game 5.  TSM need to calm down, play their own controlled game and not fall to the pressure.  Look to the success of game 3 and recognize where their strengths, and weaknesses are in this series.
G5 PB.jpg
TSM start the draft on a great foot, once again staying with the bans/1st pick strategy.  This time around though, they pick Bjerg into a strong spot from the start, giving him the ability to outperform Optimus.  Ivern is a great choice for TSM, allowing Sven to focus even more on supporting Hauntzer/Bjerg and tracking Levi.
The second round bans from GAM are strange, knocking out Lucian/Caitlyn and not Ezreal.  Either way TSM take EZ/Cait here.  The pickup of Renekton is huge for TSM, this puts Hauntzer into a skill based match up in top lane, allowing him the potential to dominate.  Another draft that plays into the strengths TSM have in this series.
At this point, the support staff’s job is done, there is no more to do.  And though it took awhile to get there, we have our 2nd strong draft from TSM, that plays into their strengths of the series.  It’s up to the players to stay away from their weakness of uncontrolled play.
We won’t look much at Game 5 for this video, as we wanted to look at recognizing and working with strengths and weaknesses within a series.  There’s much of the same in this game as the last few, GAM showing their aggression, TSM trying a little too hard, but we get to see Hauntzer in a matchup he can take over, and take over he does, nearly putting the entire team on his back and getting so far ahead that GAM have no answer for him.


Bonus: MSI Group Stage
I had wanted to have this video out earlier, but being late, we get a little bonus, the rematch of TSM v GAM in the 2nd Group stage.  TSM have had a week to study this series, recognize their strengths and weaknesses against GAM and come up with a strong solid plan for their first game in the group.
Sadly, and very disappointingly this was not the case.  TSM’s game plan and in-game play felt like no one had studied their series against GAM.  TSM came in with a plan, but one that ran entirely counter to their strengths against GAM previously.
G6 PB.jpg
I don’t really like to be negative, but TSM’s draft here is just dreadful.  It’s like they entirely forgot about their series with GAM.  First off, they ban Syndra as their last ban, which is an awful control ban at this point.  TSM should be banning Karma here, prevent one of GAM’s strongest champions from their last set, and force GAM to choose between Lulu/Gragas/Syndra.  In this way they can get 2 of those 3 picks, providing a strong start to their draft.  Instead they give GAM Gragas, a champion Hauntzer can outplay Stark with, and trade for Lulu/Graves, the first of which is just a trade with Karma, and second is just another trade against Levi with no gain for TSM.  Even in the way they banned, TSM should take Karma instead of Lulu, especially if they want to flex it, giving Bjerg something to work with instead of put on the back burner.  AFTER that, we still get a bad pick-up in Nautilus, providing a neutral lane despite how strong Hauntzer has been against Stark and while WT can get two comfortable champions banned from him in the next rotation.
The second phase draft is just as worse if not more so.  Banning Lee Sin is almost pointless, knowing that Levi will go Kha’zix and do perfectly fine early/mid/late on him.  If TSM wanted to ban jungle, send both bans at Levi and knock down the Kha’zix as well.  Banning Leblanc is also a big head scratcher.  If TSM are willing/planning to flex Lulu mid, leave Leblanc up.  It is actually a good matchup for Lulu both in lane and outside of lane.  Twitch next, well whatever, WT is running low on champions and its not the worst pick, TSM could run a Twitch composition with Orianna/Lulu and try to salvage this draft, hope for a game like Game 4 but with less errors from TSM.  Instead, they don’t put Lulu bottom, they hamper Bjerg by having him play Lulu, and put nearly 100% of the game onto Twitch.  It’s just, ugh.  I could complain about this draft and composition just by itself, let alone in context of their past series.

In the end, TSM draft a comp that plays to 0 of their strengths against GAM, completely hampering their highest win conditions and put their eggs into their weakest possible basket against GAM.  Inside of the game is no better, with TSM running a comedy of errors, once again trying to force plays and “prove” themselves, almost as if, once again, they need to validate themselves to others.

Monday, January 5, 2015

Gold Values Appendix

*Quick note to anyone who has been following the Worlds Video Analysis.  Still working on it, but will be interspersing it with newer information so videos will be slower.

Just some of the various gold sources in League of Legends.

Google Doc can be found here.  It's a little better formatted if you prefer.

gp/10 = gold per 10s
gp/w = gold per creep wave
cw = value in comparison to a creep wave

Base
19gp/10

Runes
Seals -      .25gp/10      x9 = 2.3gp/10     or a 12% increase from Base
Quints -    1gp/10         x3 = 3gp/10        or a 16% increase from Base

Masteries
Greed -            1.5gp/10      or an 8% increase from Base
Scavenger -     2.1gp/10     aka     6.3gp/w
Bandit -           2gp10 (likely),
                      6gp/10 (generous),
                      30gp/10 (extreme maximum)
                      or 15g per assist/kill

Items
AC T1 -       4.2gp/10       aka 12.6gp/w
AC T2 -       8.3gp/10       aka 19gp/w + 2gp/10
RS T1 -       5.5gp/10
RS T2 -       8.8gp/10
SE T1 -       2gp/10 to 7gp/10       3.65(33%)       5.3(66%)
SE T2 -       2gp/10 to 12gp/10     5.30(33%)       8.6(66%)
Avarice -     7.2gp/10       aka 12.6gp/w + 3gp/10

*AC gains .3gp/10 at 25mins and again at 35mins
*RS T1 changes to 6.6gp/10 at 25mins and T2 changes to 10gp/10 at 25mins and 13.3gp/10 at 35mins
**RS also gains .27gp/10 and .33gp/10 every 6 minutes starting at 7:30.
*SE is extremely variable over the course of the game. The 33% values are the most likely over the course of the game while in laning phase it is likely to be above the 66% mark.

Minions
Melee -             20gp/10       or 6.6gp/10 per minion       20g per minion
Ranged -          15gp/10       or 5gp/10 per minion       15g per minion
Siege -             4.4gp/10       or 40g per minion
Siege(25) -       6.6gp/10
Siege(35) -       13.3gp/10

Full Wave -          35gp/10       or 105g per wave
Siege Wave -       48.3gp/10       or 145g per wave
Avg Wave -         39.43gp/10       or 118.3g per wave
Avg (25) -            41.6gp/10       or 125g per wave
Wave (35) -          48.3gp/10       or 145g per wave

*Melee and Ranged Minions gain +1g every 6 mins/12 waves starting at 7:30m, Siege gains +2g
**This means the average wave gains 2.2gp/10 every 6mins/12 waves plus an extra .1/.4gp/10 at 25/35 mins per 6mins/12 waves.

Towers
Outer -      150g(local)      + 125g(global)      = 775g      x3 = 2,325g
                1.27cw              1.06cw              6.55cw      19.65cw

Inner -      100g(local)      + 150g(global)      = 850g      x3 = 2,550g
                0.85cw              1.27cw              7.19cw      21.56cw

Inhibitor -  175g(global)      = 875g      x3 = 2,625g
                1.48cw              7.40cw            22.19cw

Nexus -    150g(global)      = 750g      x2 = 1,500g
                1.27cw              6.34cw            12.68cw

*In terms of pure time, every turret is worth over 1 minute of time, compared to farming creep waves in all 3 lanes.
** This means, purely in terms of lanes/gold, taking a turret within 2 creep waves as 5 is a net worth over the other team farming all 3 lanes.

Kills
Streak                Kill Gold                Assist Gold                Total Gold
+5                500(4.23cw)                250(2.11cw)                750(6.34cw)
+4                475(4.02cw)                237(2.01cw)                712(6.02cw)
+3                408(3.45cw)                204(1.72cw)                612(5.17cw)
+2                350(2.96cw)                175(1.48cw)                525(4.44cw)
+1                300(2.54cw)                150(1.27cw)                450(3.80cw)
+0                300(2.54cw)                150(1.27cw)                450(3.80cw)
-1                275(2.32cw)                137(1.16cw)                412(3.49cw)
-2                220(1.86cw)                110(.93cw)                330(2.79cw)
-3                176(1.49cw)                88(.74cw)                264(2.23cw)
-4                141(1.19cw)                70(.60cw)                211(1.79cw)
-10                50(.42cw)                25(.21cw)                75(.63cw)

First Blood 100(.85cw)                50(.42cw)                150(1.27cw)

Assist Bonus
+2      30(.25cw)
+3      45(.38cw)
+4      60(.51cw)

*Every Kill adds +1 to your streak, always starting at 0. Resets streak to +1 if below 0.
*Every Death adds -1 to your streak, always starting at 0. Resets streak to -1 if above 0.
*Every Assist adds +1 to your streak if below 0.
*Every 1000g earned from creeps adds +1 to your streak if below 0.
*Assist Bonus is applied to every assisting champion based on (Assists - Kills)

Jungle
                  Main           Small           Total           CW Value           GP/10
Krug -          60g              14g              74g              .63cw              7.4gp/10
Raptor -       41g              9x3g            68g              .57cw              6.8gp/10
Wolves -      42g              12x2g           66g              .55cw              6.6gp/10
Gromp -       62g                                  62g              .52cw              6.2gp/10
Scuttler -      35g                                  35g              .29cw              1.94gp/10
Red/Blue -   36g              20x2g           76g              .64cw              2.53gp/10

Jungle Item Bonus           CW Value           100s              180s                 300s
Machete -                            .08cw           1gp/10              .56gp/10           .3gp/10
T2 Item -                             .17cw           2gp/10              1.1gp/10           .6gp/10

Poacher's -      .17cw      or 6.6gp/10 if used on CD.

*CW value is each camps value in relation to the average creep wave.
*Jungle Item's Bonus is added to base jungle monster values, and then Poacher's on top of that.
*In example, taking the enemy Red/Blue camp with Poacher's would be worth 98% of the average creep wave in terms of gold.
*Just an interesting note, if you could farm your jungle on respawn with T2 jungle item, you would be making 38.2gp/10 compared to 39.43gp/10 for the average creep wave.

Baron
300g(global) + 25g(kill) = 1,525g
2.54cw                          12.89cw

Using Long Sword and Amplifying Tome for gold value.
40 AD = 1,440g x5 = 7,200g
40 AP = 870g x5 = 4,350g
Total Value of Baron = 13,075g

*Note the values of the AD/AP are respectively more or less effective based on the champion and most do not get the full benefit of both parts of the buff.
*Baron has even greater value because of the strategic bonuses, but they are hard to map in terms of gold.
*Just for fun, Baron is worth up to 110.52 creep waves before the strategic bonuses.

Dragon

Buff #1
Using Long Sword and Amplifying Tome for gold value.
21.60g per 10 AD
13.05g per 10 AP

Values of AD/AP needed in comparison to 1 outer turret.
127 AD = 275g (global + local)
69 AD = 150g (global)
58 AD = 125g (local)

210 AP = 275g (global + local)
115 AP = 150g (global)
96 AP = 125g (local)

Buff #3
Using boots of speed as the baseline for gold value
203.10g at 325 MS or 6.25g per 10 MS

This value will grow champions pick up T1 and T2 boots as well as for champions with a base MS higher than 325.

*Musings on Dragon can be found here www.snowspotsgamedesign.blogspot.com/2014/12/lol-dragon-thoughtstheory-patch-421.html

Examples
Just a few ways to use this information

Looking at Support Gold Potential -
Base + Runes + Masteries + RS(duo) + SE = X
(19) + (2.3 + 3) + (1.5 + 2.1 + 6) + (5.5) + (7) = 46.4gp/10

Compare to Primary Laner -
Base + Creep Wave = X
19 + 39.43 = 58.43

Supports with Runes/Masteries, their duo laner picking up RS, and high use of Bandit/SE can end up generating 79% of the gold that their duo partner will from perfect CS. You could compare this to a support who only has -

Base + Greed + Scavenger + SE = X
19 + 1.5 + 2.1 + 7 = 29.6 or 51% of their duo.

Also looking at Seals/Quints and using Cloth Armor as a base.
1 armor = 20 gold
Armor Seals = 180g
Armor Quints = 260g

Gold Seals would reach the equivalent gold value at 14m33s.
Gold Quints would reach the equivalent gold value at 16m59s.

This information could be particularly useful in lane swap scenarios where the support is in a lot less danger and may be willing to trade out some armor for gold runes.

Quick Reference to team gold comparison.

Say the score is 14 – 10, with 3 – 1 in towers and the CS difference is roughly 50 in favor of the team ahead in kills.

One could attempt to quickly calculate the gold difference. 4 kills at the average of 450g each, 2 turrets at 775g and 50 cs being roughly 7.5 waves at roughly 120g average.

4*450+2*775+7.5*120 = 4,250g

So potentially when dead, a player could calculate a rough estimation of the gold difference between teams. This is essentially more important when there is a less clear understanding at just a glance. Such as when one team is ahead in kills, but behind in CS/Towers.

Another way to use the information would be to decide the relative value of roaming vs staying in lane or how long a jungler wants to wait for a gank. A more detailed understanding of Risk/Reward.

The information would also be useful in determining when/if to turret push and what a team would be willing to give up for that turret, or visa versa.

Saturday, December 13, 2014

[LoL] Dragon Thoughts/Theory - Patch 4.21

I wanted to take a small break from making videos from Worlds, and since I haven't been keeping too up on the pre-season (just playing a few matches), I thought I'd take a look at the new dragon, especially with the change from 4.20 to 4.21 as well as the loss of global gold/exp from season 4. Mostly I'll will be talking about the first buff, especially in relation to lane swaps and turret trading for dragon.

First I want to take a look at the timing of the new dragon buffs, mostly fastest potential speeds.

Dragon Buff Timers

Assuming you move in to take Dragon ASAP and assume respawn + 30s to kill/setup for each time, then you could end up with these timings for Dragon's buffs.

3:00 – 6% AD/AP
9:30 – 15% Building Damage
16:30 – 5% MS
22:30 – 15% Monster/Minion Damage
29:00 – Final Buff, Doubles previous, 150 damage true damage burn over 3s

These are some very generous timings, considering that teams will have to be dealing with contention over Dragon, but these are some good timings to talk about some upper potential of dragon.

Buff #1

Some quick gold values for the 6% AD/AP, using Long Sword and Amplifying Tome for the value of the buff as they are closer to the gain the opposite team would get by taking a turret, as opposed to the higher stat gain per gold value of Needlessly Large Rod and B. F. Sword.

The buff is worth -

21.60g per 10 AD
13.05g per 10 AP

This gives an early dragon take some decent gold values, though not quite as valuable as the season 4 dragon, though the results are immediate (which makes a huge difference). Making a rough estimation, it would not be until the 80-100 AD mark, or the 130-160 AP mark where the gold value of the 6% damage buff will be equivalent to the gold of the first dragon take (depending on what level the dragon is at the first take). However, even though it takes longer to reach that equivalent gold value, very early takes of the new dragon are MORE valuable than the old dragon because of the immediate results. Teams will receive the buff in lane, before their first buy, and though the gold from the previous incarnation of dragon would mean that first buy is delayed, when the first buy happens (particularly on AD focused champions) champions will be getting more gold value out of the dragon buff than the previous season 4 dragon. This effect is a bit muted for tank focused champions though, so teams need to take this into consideration as well.

Overall though, the new dragon buff #1 is going to be of higher value compared to the old dragon alone. The really interesting interaction comes when you consider how this new dragon compares to trading for an early turret.

Values of AD/AP needed to compare to an outer turret global/local gold -

127 AD = 275g (global + local)
58 AD = 125g (local)

210 AP = 275g
96 AP = 125g

For the global gold, values are going to be very similar, particularly in terms of AD, every champion in the game will be getting more value out of the 6% buff than they would be getting out of the turret gold. This becomes a slightly better trade in terms of AP values, however AP champions will also be benefiting from the AD buff (though in very small numbers). So purely in terms of global gold, an early dragon trade is going to be in favor of the dragon. It must be said though, these are small numbers we will be working with in terms of extra AD/AP and gold values.

The real interesting interaction comes when you compare the early dragon to the values of local gold. It takes a lot more AD/AP to compensate for the extra gold that one person can gain from the turret. Just like in season 4, this means that trading a turret for dragon creates a power focus against a power spread. Two things can also increase this power focus, where as nothing will increase the value of dragon in trade.

1 – The team taking the turret trade also gets a kill in the tower dive/take. This would create a much more power focus and give a lot of advantage to the champion(s) that were able to pick up the kill/assist. What this means for the team that decides to take dragon, is that they must also be willing to sacrifice the turret in a trade, and not take the risk of defending it, as it could hugely backfire.

2 - If the champion getting the local gold from the turret is a tank focused champion. Since they will be netting the least value from dragon, they gain more power from the focused gold than they would get from having the dragon buff themselves.

What we see from this is that while dragon has a pretty flat value of gain for a team, trading for a turret can end up with an even larger spike in power for that team, if they are able to get a kill, and/or they are running a tank champion that gets that local gold. These two things, particularly the kill, are a bit of an ideal scenario though, and the champion kill should not be happening if the team taking dragon is playing properly. If it does happen however, then the trade is going to be very high in favor of the kill/turret for dragon.

As with the previous incarnation of dragon, a pure 1 turret for 1 dragon trade ends up with the power focused onto the champion who gets the local turret gold, while slightly greater power is going onto the entire team who kills dragon. This generally ends up as a slight advantage for the team that creates the focus early, because now they have a lane that will have a clear advantage and can focus ganks and pressure onto it, keeping the opposing champion(s) in a weaker position, hopefully causing them to lose gold/exp from CS, creating a greater power divide in that lane. On the opposing hand, the 6% buff across the dragon taking team is going to be small early on, and unlikely to cause a lead in any lane. This is where taking the turret, in terms of gold value, is going to end up being the better trade in most situations

Of course, there is a lot more to the turret vs. dragon trade. Most of it is the same as season 4 dragon. You're gaining map pressure by taking the turret, giving yourself a few more options of movement around the map, as well as better vision control in that area. In lane swaps it also means that from then on you can force the 2v2 in bottom lane (as more often than not its a trade on top turret) or allow the opposing team to move their duo to the top lane, making them vulnerable to ganks and giving your team pressure for the second dragon. Outside of the map pressure, with the power focus in one lane, you can bully that lane until the second dragon, increasing the power difference. This means that when the second dragon spawns, the team who has taken the turret trade is likely to have a solid power spike to take control of that second dragon. (We can see this happening a lot when teams are running Rumble top, getting him ahead and using his mid-game power spike to take the second dragon).

On the side of the team who takes dragon, we do see some more interesting results than from last season. The team still has the potential gold of the extra turret that is up, like before, but now they have a scaling buff that will eventually be way more valuable than the turret, in terms of gold, as well as having grabbed that first dragon buff and are looking to getting the rest of the buffs at a quicker pace. Let's take a look at what this ends up meaning for a few team compositions.

As Mid-Game focused -

An early dragon will allow you to reach that final buff a lot quicker, syncing up with the strong power you are looking for around that 30 to 35 minute mark. This gives the early dragon a lot of value for these teams. The flip side is they will be losing a little bit of mid-game power around the second dragon, especially if your mid-game power focus is in your top lane, though if you are running the mid-game spike on your boat lane, IE. Corki, then you will not be suffering nearly as much from the trade, and the early dragon will be huge for you.

As Siege focused -

You're really going to be getting the biggest benefit from the second buff, so this trade becomes of situation of when you want to start your team siege, and how well you think you will be able to contest for that second or third dragon to get buff #2. The second buff will be a huge boon for you team, and make those 1 or two shots you are able to get onto a turret that much more valuable. If you are looking to start your siege around the 11-15 minute mark, trading and taking the first dragon will be valuable for you, where as if you are planning around the 18-20 minute mark to start sieging, the choice will come down to how well you feel you can fight for dragon's 2 and 3, whether you want to guarantee your first buff in a trade, and look for the opportunity to take either 2 or 3 or you feel your team can turn that power focus into stronger dragon fights than your opponents.

As Late-Game focused -

Taking the dragon trade is going to be valuable to you, primarily in denying the early gain of the later buffs to mid-game focused teams, and making sure that you have that strong first buff that will compliment your late game focus. These are two strong points, and probably one of the best team compositions to be willing to trade a turret for that early dragon and then look to take other objectives will the opposing team picks up dragon's. This will force buff #2 towards the 16+ minute mark (longer if that first dragon is delayed) and delay that deadly buff #5 until the early-late game (at least 35 minutes in) where the Late Game team will be able to start to contest them.

As Tank/Bruiser focused -

The first dragon is going to be a lot less important for these teams, as they will not be building as much AD or AP as other teams, normally opting into early AR/MR/HP items rather than damage focused ones. It will be much more in their favor to look for that early turret in trade, getting better gold focus into that lane and helping to secure future dragon's as well as opening up the map for skirmishes and jungle bullying earlier on.

As Split-Push Focus -

The early dragon vs. turret is going to be a fairly even trade, depending on who gets the local turret gold. On your primary split-pusher, this would give them an earlier opportunity to create that pressure around the map, opening up potential possibilities, against another split-push focused team, this would be the better choice. Against other team compositions, particularly ones that are 5v5 focused, it may be the better idea to take that early dragon as taking dragon's later on will be much harder. This would delay that final buff and give a longer window for the split-push team to work with.

These are just some general advantages that a few team compositions would can gain from the early dragon, as well as some denial they can cause. Specific games will of course have to be individually considered, what kind of team compositions both sides are running, when they hit power spikes, what is going be be there focus, etc and how the team compositions will interact with each other as well as the dragon buffs and the potential timing of them.

We can't also forget, that trading turret for dragon is not the only option, extending the laning phases and running standard lanes is also a choice that teams can make, one that will naturally delay the timing of dragon buffs which will be more beneficial for one team than the other at times. In example, siege compositions that feel they will have an advantage on the early-mid game dragon fights could look to draw out the laning phase, timing dragon 1 and 2 so that the second buff coincides with when they want to start their siege.

All in all, it's a lot more of an interesting interaction on the early dragon in this season than the last one.


Buff #2

This buff is going to be very strong for mid-game and siege focused teams. For these teams, especially against teams that have solid wave clear, it is very important for them to maximize their damage against turrets, allowing them to push the advantage they have faster and creating a larger one through gold lead and map pressure. This buff makes every hit they are able to sneak/weave in during a siege or map rotation that much more valuable. For other team compositions, this ends up more as a stepping stone to to the #3 and #5 buff as they will be less focused on making turrets their primary objective in matches.


Buff #3

This buff is (aside from the final buff) is the 2nd most important buff that dragon offers in most situations. Movement speed is very nice for everyone, offering greater map control, better rotations, greater escape in split-pushes and away from fights, better chase potential, and stronger ability to dodge skillshots and find proper positioning in teamfights. All in all just a very solid buff that is beneficial to everyone and every composition on similar values. While the earlier you get this buff, the better it is for your team, it's strength will shine more around the post 20 minute mark or the mid-game, where map rotations are huge factors in winning the game. This means that in an early turret/dragon trade, this buff is not a huge factor in that value, as the difference between picking this buff up at the 16-18 minute mark or the 22-24 minute mark will not make a huge difference in most cases.

This buff has a base gold value of 203.10g at 325 MS (using boots of speed as the baseline for gold value), the lowest base value of champion MS. This of course grows when champions pick up T1 and T2 boots.


Buff #4

This buff is in a way, useless and a placeholder. It would almost be better, or at least a bit sillier if instead this buff just said “charging up to super saiyan levels.” The big reason this buff is a bit useless, is that at this point in the game, teams should have enough damage for wave clear. 22+ minutes into the game, we should be seeing full first items if not a full 2 items from teams and AP champions with a Death Cap will be able to wave clear very quickly already. Teams getting to this 4th buff early, when the bonus you would get to wave clear would be the most useful, are much more likely to be mid-game focused and on the offensive, they will not be getting nearly as much benefit from this in map rotations, siege, or any offensive moves than a defensive team would gain from this buff.

The one thing that this buff does offer, is greater Baron pressure, giving a large increase in damage against it, so teams looking to take an early Baron in particular, will want to look at reaching this buff early.

One big thing to note, is that this was Buff #2 in Patch 4.20. In the previous patch, this buff was much stronger, being a great pick up for late game teams who want that early wave clear power to survive against mid-game teams. It would also let teams clear the jungle faster, earlier in the game, creating extra potential gold for teams, as well as allowing roaming champions to clear out their waves faster. This buff was a lot stronger in its previous position. The Building damage buff still had value as buff #4 for all the same reasons that it has value now.

This swap really changed dragon's focus onto mid-game teams. The earlier turret damage gaining increased value early on, especially for siege compositions or heavy map rotation teams, while late-game/defensive teams really lose out in this buff swap, not being able to make solid use of the Building Damage while the Minion/Monster Damage is much much less useful later on than it is early.


Buff #5

Well, there's not a whole lot to say about this one. This is just a huge buff, often times a game ender, providing so much in terms of just, everything. Combat stats, map movement, Baron control, base races, siege, diving, everything is amplified and creates a massive advantage for the team that is able to pick it up. The really interaction with this buff between teams is how long you can deny the other team from getting this buff, and that's part of where the early dragon interaction between teams is also extremely important.


TLDR/Recap

Dragon is now a much more interesting objective with a lot of the interaction placed onto the timing of the first dragon and what teams are willing to give up to get it, or willing to take to give it up. Certain team compositions will benefit differently from the timing of the first dragon take, and whether or not they want to use that first dragon to speed themselves towards the rest of the buffs, or as a denial, delaying the rest of the buffs for your opposition. Teams will have to decide where their priorities lay, not just for the first dragon, but for the respawn times and buffs down the line as these have become way more important. No longer is that first dragon simply about a gold trade, but rather potential changes to in game play on a much larger scale.

Unfortunately, the current dragon very heavily focuses mid-game teams, putting another huge timer in the final buff against late-game compositions, providing a huge way for the mid-game teams to close out a game. With the switch of Buff #2/4 this mid-game focus has been made even higher, allowing even small windows to remove turrets from the map that much stronger.